idea 起因是想要自己搭建云服务器,同时还想要利用手上已经有的esp8266开发板实现对该服务器的远程控制(开关机)。
本来打算整一个备用电源给服务器供电,奈何这台服务器是普通PC,即使配置已经很低(与现代PC比较为拉胯,但是比大多数出售的服务器例如某云2核4g更加)但功耗的保守估计已经超过70w。
于是便打算使用远程开关降低平均功耗。同时进行物联网方面知识的扫盲与学习。
过程 1.前期准备 首先,在已经搭建好的mqtt服务器上创建了用户user和密码passwd,同时处于安全性考虑禁止匿名访问。配置mqtt服务器的过程 )
创建好测试主题(topic)test后进行测试。多平台测试收发message没问题。
2.中期打BOSS 接下来就是攻克esp8266这边的问题了。
由于这块esp8266开发板是我在高中时期玩的,那时候的电脑早已坏掉,这台电脑的arduinoIDE 还未配置esp8266的环境。
本来打算使用platformIO但是太慢了,在下载框架以及支持的时候解决了ide的问题。。。
需要配置:
方法一:ide设置里的 Additional boards manager URLs添加http://arduino.esp8266.com/stable/package_esp8266com_index.json
方法二:手动添加:下载esp8266_package_installer直接离线下载
增加库:
<PubSubClient.h>ESP8266WiFi.h
1
2
3
4
5
6
MQTT Server Connect Failed. Client State:-2 MQTT Server Connect Failed. Client State:-2 MQTT Server Connect Failed. Client State:-2 MQTT Server Connect Failed. Client State:-2 MQTT Server Connect Failed. Client State:-2 MQTT Server Connect Failed. Client State:-2
其实主要是平台的问题,8266,以及PubSubClient.h库中的案例程序和大多数网上教程都是使用的别人的mqtt服务器,他们往往不需要提供账号密码等等。例如
1 2 3 4 5 6 7 8 9 10 11 12 13 14 15 16 17 18 19 20 21 22 23 24 25 26 27 28 29 30 31 32 33 34 35 36 37 38 39 40 41 42 43 44 45 46 47 48 49 50 51 52 53 54 55 56 57 58 59 60 61 62 63 64 65 66 67 68 69 70 71 72 73 74 75 76 77 78 79 80 #include <SPI.h> #include <Ethernet.h> #include <PubSubClient.h> byte mac[] = { 0xDE , 0xED , 0xBA , 0xFE , 0xFE , 0xED }; IPAddress ip (172 , 16 , 0 , 100 ) ;IPAddress server (172 , 16 , 0 , 2 ) ;void callback (char * topic, byte* payload, unsigned int length) Serial.print ("Message arrived [" ); Serial.print (topic); Serial.print ("] " ); for (int i=0 ;i<length;i++) { Serial.print ((char )payload[i]); } Serial.println (); } EthernetClient ethClient; PubSubClient client (ethClient) ;void reconnect () while (!client.connected ()) { Serial.print ("Attempting MQTT connection..." ); if (client.connect ("arduinoClient" )) { Serial.println ("connected" ); client.publish ("outTopic" ,"hello world" ); client.subscribe ("inTopic" ); } else { Serial.print ("failed, rc=" ); Serial.print (client.state ()); Serial.println (" try again in 5 seconds" ); delay (5000 ); } } } void setup () Serial.begin (57600 ); client.setServer (server, 1883 ); client.setCallback (callback); Ethernet.begin (mac, ip); delay (1500 ); } void loop () if (!client.connected ()) { reconnect (); } client.loop (); }
以及太极创客的代码
1 2 3 4 5 6 7 8 9 10 11 12 13 14 15 16 17 18 19 20 21 22 23 24 25 26 27 28 29 30 31 32 33 34 35 36 37 38 39 40 41 42 43 44 45 46 47 48 49 50 51 52 53 54 55 56 57 58 59 60 61 62 63 64 65 66 67 68 69 70 71 72 73 74 75 76 77 78 79 80 81 82 83 84 85 86 87 88 89 90 91 92 93 94 95 96 97 98 99 100 101 102 103 104 105 106 107 108 109 110 111 112 113 114 115 116 117 118 119 120 121 122 123 124 125 #include <ESP8266WiFi.h> #include <PubSubClient.h> #include <Ticker.h> const char * ssid = "lkw" ;const char * password = "01234567890" ;const char * mqttServer = "192.168.43.61" ;Ticker ticker; WiFiClient wifiClient; PubSubClient mqttClient (wifiClient) ;int count; void setup () Serial.begin (9600 ); WiFi.mode (WIFI_STA); connectWifi (); mqttClient.setServer (mqttServer, 1883 ); connectMQTTServer (); ticker.attach (1 , tickerCount); } void loop () if (mqttClient.connected ()) { if (count >= 3 ){ pubMQTTmsg (); count = 0 ; } mqttClient.loop (); } else { connectMQTTServer (); } } void tickerCount () count++; } void connectMQTTServer () String clientId = "esp8266-" + WiFi.macAddress (); if (mqttClient.connect (clientId.c_str ())) { Serial.println ("MQTT Server Connected." ); Serial.println ("Server Address: " ); Serial.println (mqttServer); Serial.println ("ClientId:" ); Serial.println (clientId); } else { Serial.print ("MQTT Server Connect Failed. Client State:" ); Serial.println (mqttClient.state ()); delay (3000 ); } } void pubMQTTmsg () static int value; String topicString = "lkwMQTTtopic" ; char publishTopic[topicString.length () + 1 ]; strcpy (publishTopic, topicString.c_str ()); String messageString = "Hello World " + String (value++); char publishMsg[messageString.length () + 1 ]; strcpy (publishMsg, messageString.c_str ()); if (mqttClient.publish (publishTopic, publishMsg)){ Serial.println ("Publish Topic:" );Serial.println (publishTopic); Serial.println ("Publish message:" );Serial.println (publishMsg); } else { Serial.println ("Message Publish Failed." ); } } void connectWifi () WiFi.begin (ssid, password); while (WiFi.status () != WL_CONNECTED) { delay (1000 ); Serial.print ("." ); } Serial.println ("" ); Serial.println ("WiFi Connected!" ); Serial.println ("" ); }
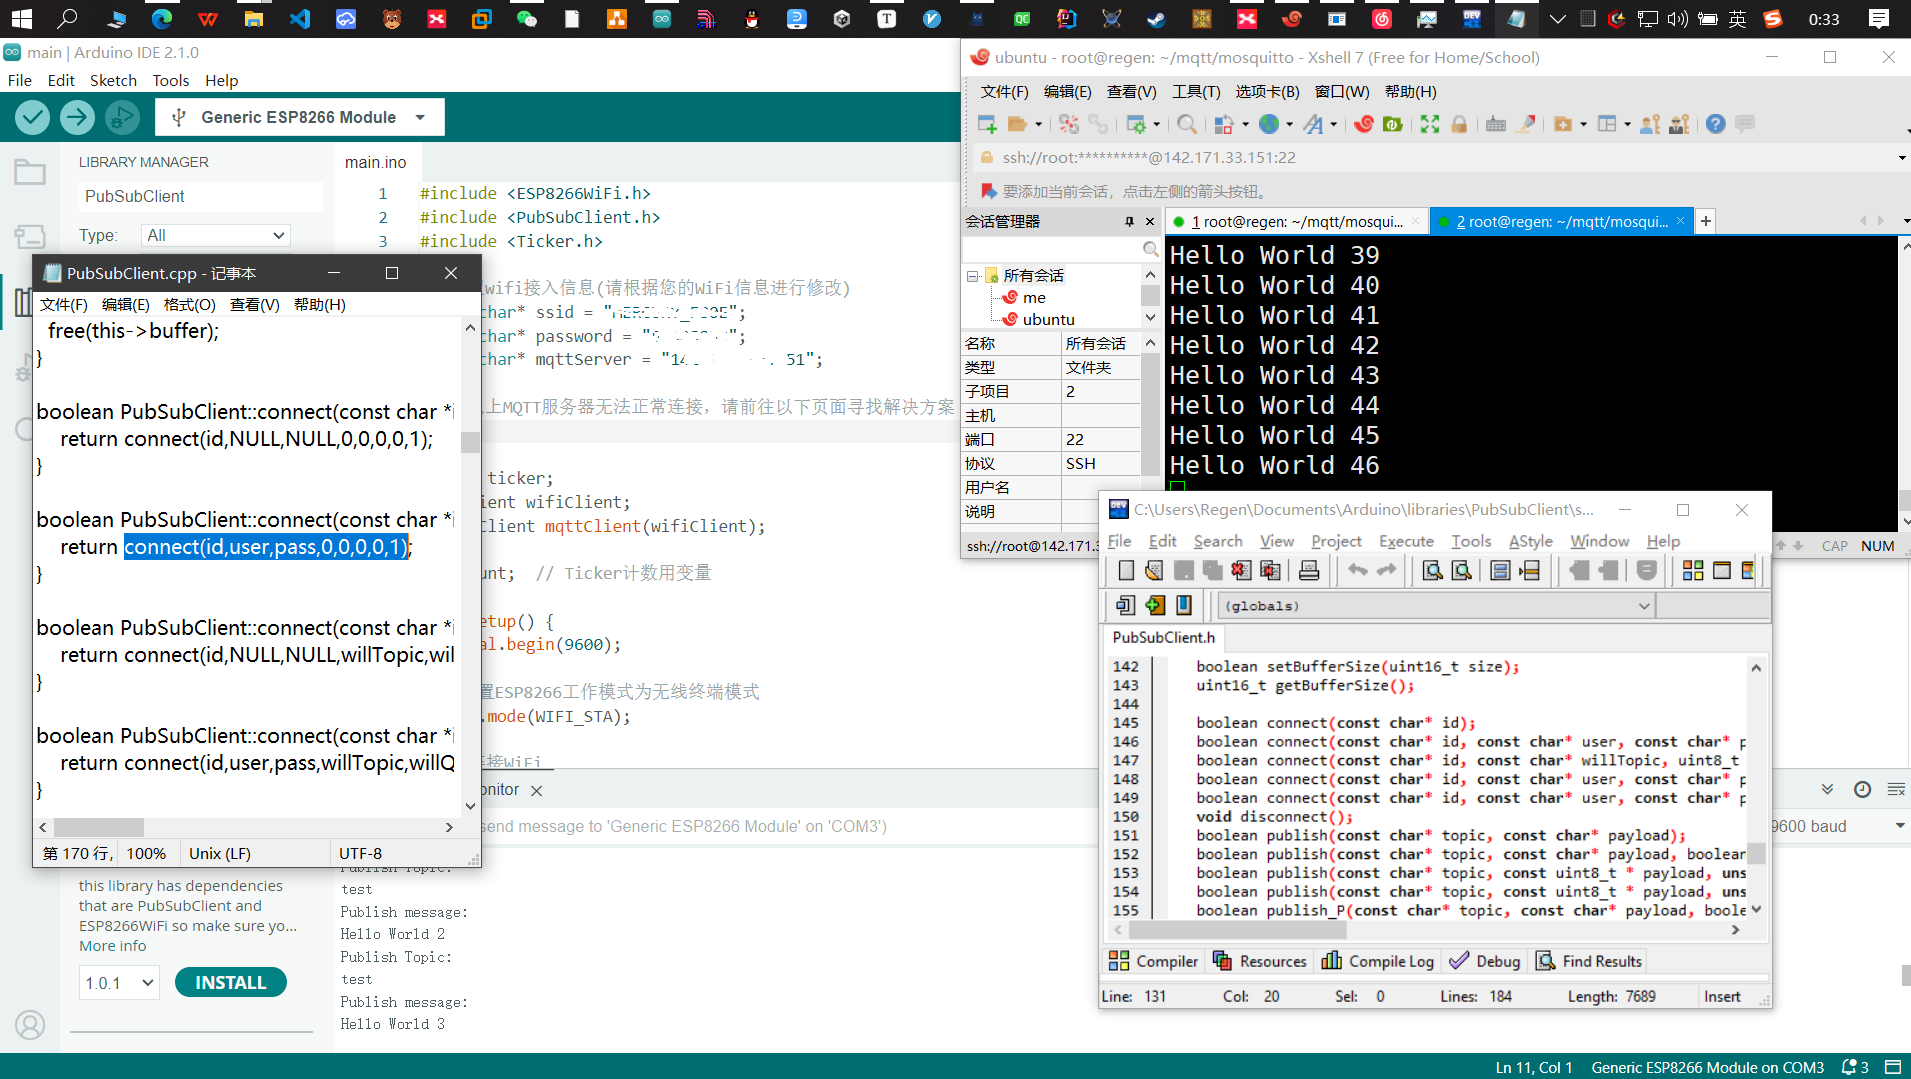
解决方法:查看PubSubClient的源代码
幸亏结构挺简单,很容易就找到了想要的代码即PubSubClient的connect方法
1
2
3
4
5
6
boolean connect (const char * id) ; boolean connect (const char * id, const char * user, const char * pass) ; boolean connect (const char * id, const char * willTopic, uint8_t willQos, boolean willRetain, const char * willMessage) ; boolean connect (const char * id, const char * user, const char * pass, const char * willTopic, uint8_t willQos, boolean willRetain, const char * willMessage) ; boolean connect (const char * id, const char * user, const char * pass, const char * willTopic, uint8_t willQos, boolean willRetain, const char * willMessage, boolean cleanSession) ; void disconnect ()
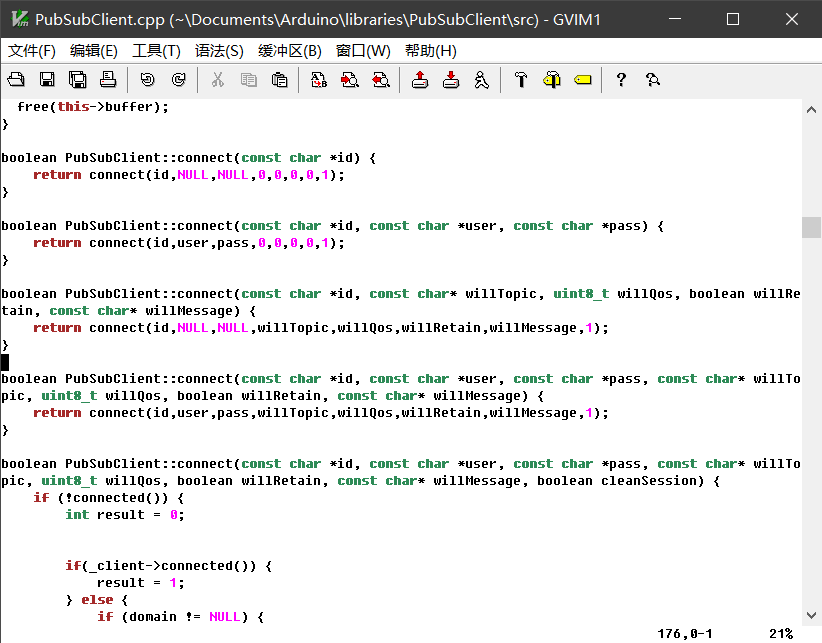
在PubSubClient.cpp
1
2
3
4
5
6
7
8
9
10
11
12
13
14
15
16
17
18
19
20
21
22
23
24
25
26
27
boolean PubSubClient::connect (const char *id) { return connect (id,NULL ,NULL ,0 ,0 ,0 ,0 ,1 ); } boolean PubSubClient::connect (const char *id, const char *user, const char *pass) { return connect (id,user,pass,0 ,0 ,0 ,0 ,1 ); } boolean PubSubClient::connect (const char *id, const char * willTopic, uint8_t willQos, boolean willRetain, const char * willMessage) { return connect (id,NULL ,NULL ,willTopic,willQos,willRetain,willMessage,1 ); } boolean PubSubClient::connect (const char *id, const char *user, const char *pass, const char * willTopic, uint8_t willQos, boolean willRetain, const char * willMessage) { return connect (id,user,pass,willTopic,willQos,willRetain,willMessage,1 ); } boolean PubSubClient::connect (const char *id, const char *user, const char *pass, const char * willTopic, uint8_t willQos, boolean willRetain, const char * willMessage, boolean cleanSession) { if (!connected ()) { int result = 0 ; if (_client->connected ()) { result = 1 ; } else {
于是就得出 connect 重载函数本体只有一个,即最后一个,我可以修改输入的参数实现自己想要的功能。
1
2
3
boolean PubSubClient::connect (const char *id, const char *user, const char *pass) { return connect (id,user,pass,0 ,0 ,0 ,0 ,1 ); }
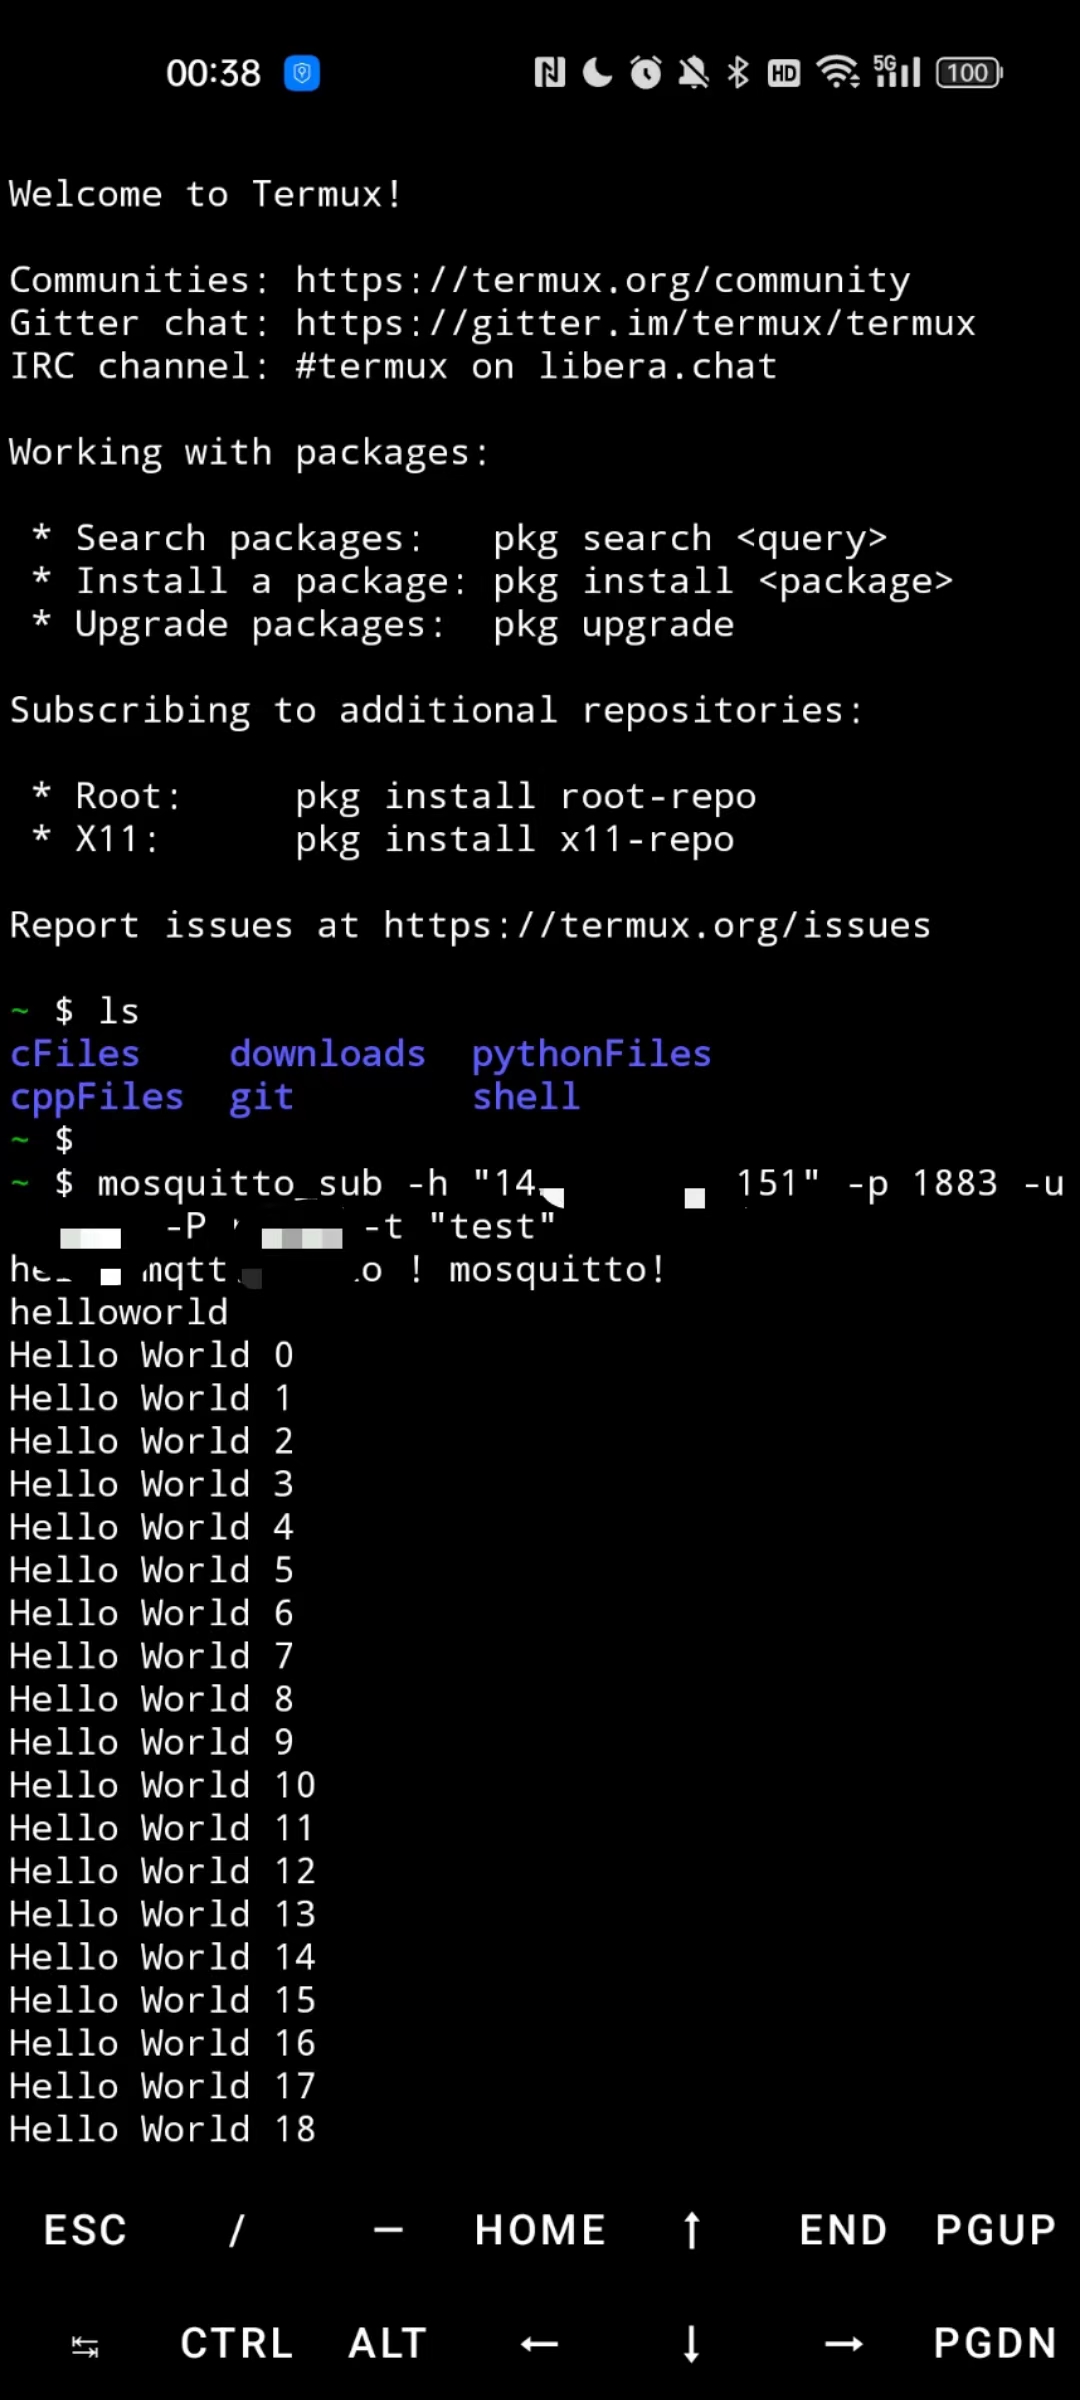
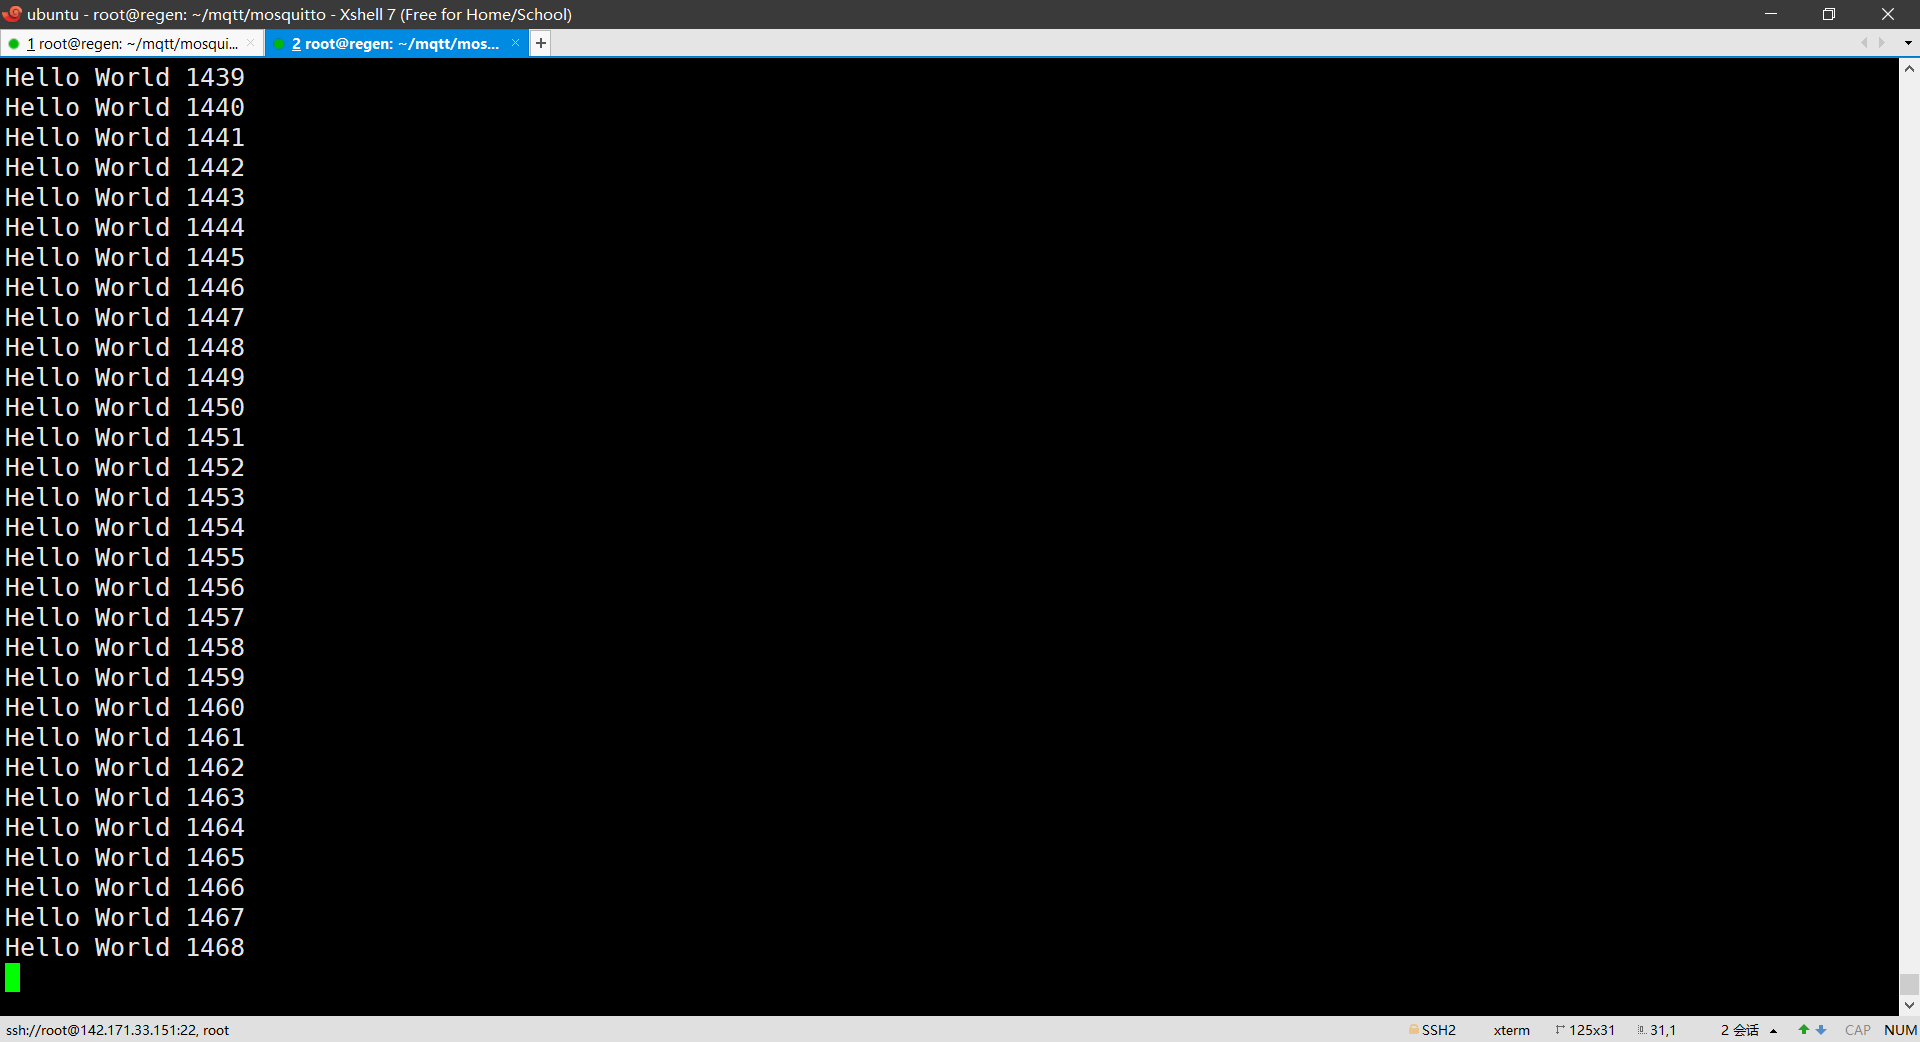
3.结尾 先附上自己的代码,修改了连接模板代码 部分。
1 2 3 4 5 6 7 8 9 10 11 12 13 14 15 16 17 18 19 20 21 22 23 24 25 26 27 28 29 30 31 32 33 34 35 36 37 38 39 40 41 42 43 44 45 46 47 48 49 50 51 52 53 54 55 56 57 58 59 60 61 62 63 64 65 66 67 68 69 70 71 72 73 74 75 76 77 78 79 80 81 82 83 84 85 86 87 88 89 90 91 92 93 94 95 96 97 98 99 100 101 102 103 104 105 106 107 108 109 110 111 112 #include <ESP8266WiFi.h> #include <PubSubClient.h> #include <Ticker.h> const char * ssid = "MERCURY_F80E" ;const char * password = "********" ;const char * mqttServer = "regenm.gitee.io" ;Ticker ticker; WiFiClient wifiClient; PubSubClient mqttClient (wifiClient) ;int count; void setup () Serial.begin (9600 ); WiFi.mode (WIFI_STA); connectWifi (); mqttClient.setServer (mqttServer, 1883 ); connectMQTTServer (); ticker.attach (1 , tickerCount); } void loop () if (mqttClient.connected ()) { if (count >= 3 ) { pubMQTTmsg (); count = 0 ; } mqttClient.loop (); } else { connectMQTTServer (); } } void tickerCount () count++; } void connectMQTTServer () String clientId = "regen" ; String userRegen = "user" ; String passwdRegen = "passwd" ; if (mqttClient.connect (clientId.c_str (),userRegen.c_str () ,passwdRegen.c_str () )) { Serial.println ("MQTT Server Connected." ); Serial.println ("Server Address: " ); Serial.println (mqttServer); Serial.println ("ClientId:" ); Serial.println (clientId); } else { Serial.print ("MQTT Server Connect Failed. Client State:" ); Serial.println (mqttClient.state ()); delay (3000 ); } } void pubMQTTmsg () static int value; String topicString = "test" ; char publishTopic[topicString.length () + 1 ]; strcpy (publishTopic, topicString.c_str ()); String messageString = "Hello World " + String (value++); char publishMsg[messageString.length () + 1 ]; strcpy (publishMsg, messageString.c_str ()); if (mqttClient.publish (publishTopic, publishMsg)) { Serial.println ("Publish Topic:" ); Serial.println (publishTopic); Serial.println ("Publish message:" ); Serial.println (publishMsg); } else { Serial.println ("Message Publish Failed." ); } } void connectWifi () WiFi.begin (ssid, password); while (WiFi.status () != WL_CONNECTED) { delay (1000 ); Serial.print ("." ); } Serial.println ("" ); Serial.println ("WiFi Connected!" ); Serial.println ("" ); }
经过测试后成功,附上截图: